Pages

Showing posts with label Friday Mashup. Show all posts

Monday, 17 September 2012

Paisley Petals Starburst with a little French Foliage


Good afternoon crafty peeps.  I've a little challenge for you.  Some of my customers have admitted to being a little designer paper challenged.  So I'm showing a card today using the gorgeous Paisley Petals Designer Papers.  All Stampin' Up! papers are on the retiral list as new designs will come in with the new catalogue in October.  And this set is 40% off so thats 12 sheets down to £5.97!  So get your skates on if you fancy these designs as they are going going gone!

For my card today I've followed the sketch over at The Friday Mashup


The mashup is to follow the sketch or use the starburst technique (you can follow a link to a tutorial on the blog) or do both. 

Honestly ladies this was so easy to do and with Stampin' Up! designer papers it's even easier because you know the patterns/colours are going to co-ordinate.  I followed the tutorial and matted my starburst panel onto Early Espresso after sponging the edge of each piece with the Early Espresso ink.  I stamped a leaf from French Foliage in Old Olive, stamping 3 times without reinking.  Then punched out with the 1 3/4" circle punch and attached to a mat of Early Espresso cut with the Circles 2 Die.  I added a bottom panel using the reverse of one of the papers from the range (they are all double sided).  Just for you is from Tea Shoppe and stamped in Tangerine Tango then punched out with the Word Window Punch.

So ladies fancy having a go?  Come on, we can cure your paper phobia! Hee hee see you next time. x 

Supplies Required
All Stampin' Up!

Card - Old Olive, Early Espresso, Whisper White
Ink - Early Espresso, Tangerine Tango, Old Olive
Stamp - French Foliage, Tea Shoppe
Punch - 1 3/4" Circle, Word Window
Die - Circle 2 
Papers - Paisley Petals 

If you would like to order any of the above or the other supplies from the current catalogues then please get in touch either by e mail ails300@btinternet.com or call 07827923123.  I would be delighted to help you with your crafty projects.  A parcel of lovely goodies could be winging it's way to you direct to your home in the UK!  

Get in touch now to join my Stampers 6 (look at the Virtual Hostess Page for details) starting in October, only 2 places left!! 

Check out the sales 


Friday, 24 August 2012

Scraps in a Frame!


What is she speaking about?  I know, I know but my imagination for a post title has gone walk about. Almost as bad as naming a film Snakes on a Plane!  Anyway it is scraps in a frame.  

Basically I decided to join in with The Friday Mashup this week which is to use the following colours Midnight Muse, Tempting Turquoise, SO Saffron and Soft Suede.  Or make a Thank you card or mash it up and do both.  I decided to do both and to use the inspiration photo. 


Aren't these cushions gorgeous? 

For my card I started with a So Saffron base.  Then made a panel of 1cm strips.  I used textured Tempting Turquoise, So Saffron cardstock, Midnight Muse cardstock (sneak peak of one of the new in colours, it's fab!) Soft Suede Patterned paper from Neutrals Stack and Beau Chateau Patterned Paper.  I attached this to the card base.  Then made a window frame from Tempting Turquoise card stock using the Labels Collection Framelit.  This was popped up on Dimensionals.  The little tag is also cut using the Framelits and trimmed to tuck under the main panel.  The sentiment is from Teeny Tiny Wishes stamped in Midnight Muse on Very Vanilla.  

Well it's friday night and first week back at school is behind us and we survived!  Thanks goodness it's the weekend though.  Hope you've had a good week.  Happy crafting. x 


Supplies Used
All Stampin' Up!

Card - So Saffron, Textured Tempting Turquoise, Midnight Muse, Very Vanilla
ink - Midnight Muse
Stamp - Teeny Tiny Wishes
Framelit - Labels Collection
Other - Dimensionals

If you would like to order any of the above or the other supplies from the current catalogues then please get in touch either by e mail ails300@btinternet.com or call 07827923123.  I would be delighted to help you with your crafty projects.  A parcel of lovely goodies could be winging it's way to you direct to your home in the UK!  
Remember your Reason To Smile!  Buy or receive this beautiful exclusive August stamp set for free (when you spend £60)
Get in touch now to join my Stampers 6 starting in October, only a couple of places left!! 


Friday, 25 May 2012

Masculine Sail Away


Wouldn't it be nice to be out on the water today?  We are enjoying another glorious day in Aberdeen.  

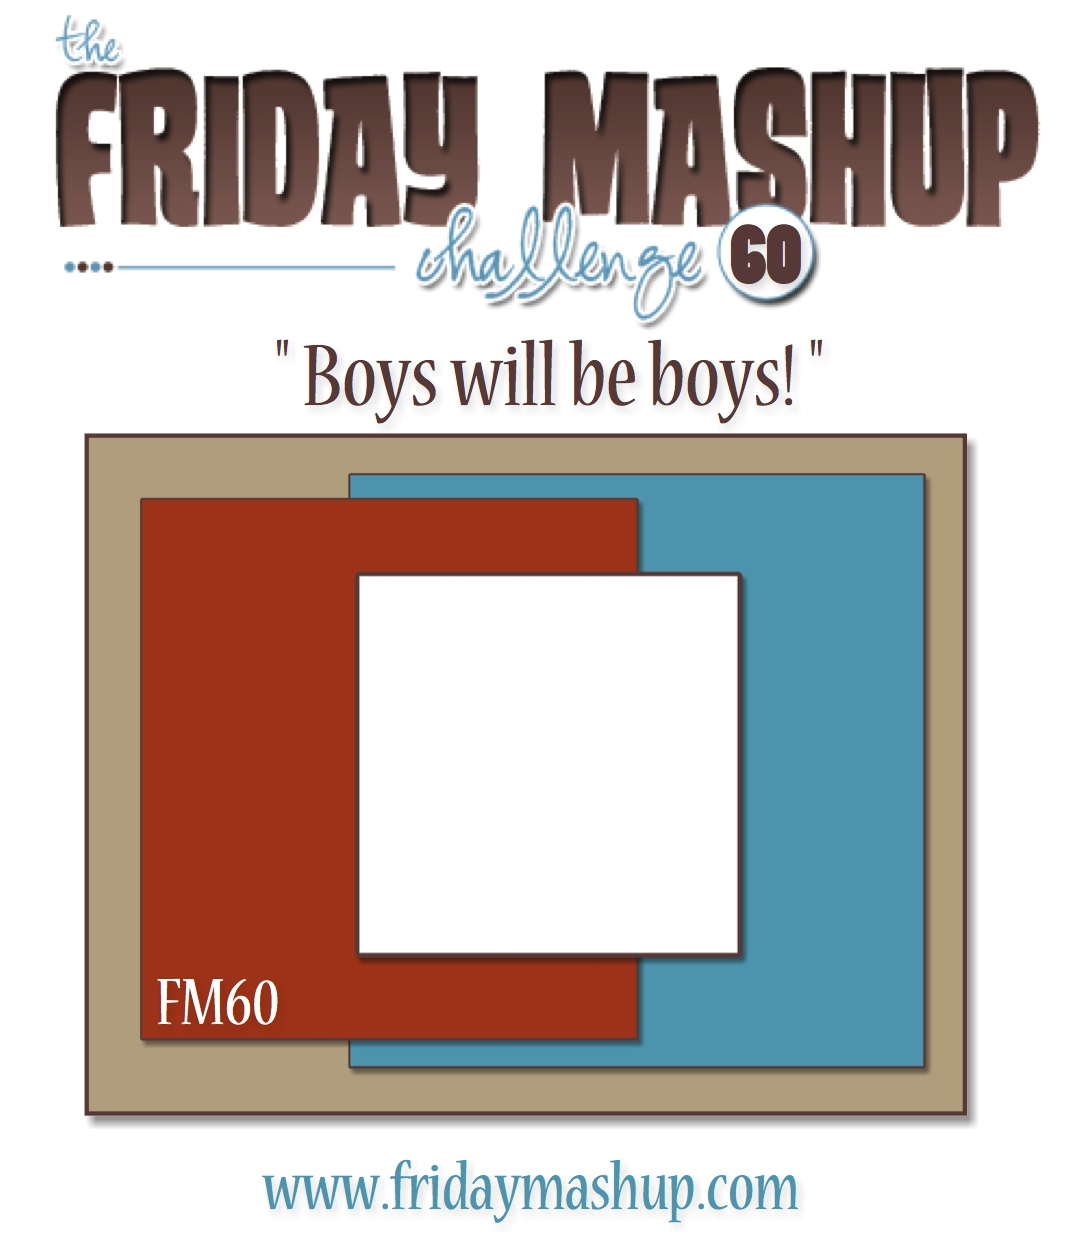
This card is for the Friday Mashup challenge which is to follow a sketch and make a masculine card if you wish to mash it up.  Here's the sketch - 


I'm delighted to say that my card for last weeks challenge was chosen for Mashup Glamette!  You can see it here.  


As we are fast approaching June and Father's Day, I've gone ahead with the mash up.  

The card base is Crumb Cake.  The base mat is Concord Crush with torn edges.  I've wrapped some Linen Thread around it and added a Neutral Button.  

The next panel is a Neutral Designer Series Paper with a Chocolate Chip mat.  The Sail Away panel is on Glossy Paper.  I stamped the Sail Away stamp in Concord Crush and used a Versamark pen on the sail and waves.  Then clear embossed.

I used my Brayer with some Perfect Plum and then Concord Crush to go over the image.  I then sponged the edges with Concord Crush. 

Hope you ae out enjoying the sunshine whilst it here.  Thanks for coming in past. x 

Supplies Used
All Stampin' Up!

Card - Crumb Cake, Chocolate Chip, Concord Crush, Glossy
Ink - Concord Crush, Perfect Plum, Versamark
Stamp - Sail Away
Designer Series Stack - Neutrals
Other - Linen Thread, Neutrals Buttons, Sponge Daubers, Brayer

If you would like to order any of the above or the other supplies from the current catalogues then please get in touch either by e mail ails300@btinternet.com or call 07827923123.  I would be delighted to help you with your crafty projects. 


Friday, 27 April 2012

Up up and Away Graduation


Aw I'm sad today.   It's the last week of my guest spot at The Friday Mashup.  It's been great fun though, lovely fab challenges and a great bunch of ladies on the team.  Thanks for giving me such a warm welcome. 

Here's this weeks challenge -


So here is the "Mashup" Challenge :
  1. Make a project for "Graduation".
  2. Or Make a project using " Text or Definition Stamps and/or Paper".
  3. Or "Mash it Up" and create a " Graduation project with Text or Definition stamps/papers".

For my card I've given you sneak peak into the new Summer Mini Catalogue available from 1st May.  I've used Up up and Away, a fab hot air balloon set with some cool sentiments.  A definite must!

First of all I sponged a panel of Whisper White to make cloud shapes with Marina Mist.  I then stamped Happy Graduation from Teeny Tiny Wishes all over the panel, also in Marina Mist.  I attached this to a mat of Marina Mist. 


I stamped the little basket and trailing flags in Basic Black.  Then on another piece of Whisper White, I again stamped an area with Happy Graduation. Over this I stamped one of the hot air balloons in Basic Black and cut out.  Then attached with a Dimensional.


The background panel is a Basic Black mat with Designer Paper from the Neutrals Stack.  I added Basic Black 5/8" Satin Ribbon over the join of the two papers. Then attached the hot air balloon panel over the top.  The sentiment from Up up and Away is stamped in Basic Black and punched out with the 1" Circle Punch.  It's attached to a mat of Marina Mist punched out with the 1 1/4" Circle Punch.  It's popped up on a Dimensional. 


The card base is Bashful Blue.  Hope you join in this week and have fun crafting.  Thanks for stopping by.  Have a great weekend. x 


Supplies Used
All Stampin' Up!

Card- Bashful Blue, Marina Mist, Basic Black
Ink - Marina Mist, Basic Black
Stamp - Up up and Away, 
Paper - Neutrals Stack
Punch - 1" Circle, 1 1/4" Circle
Other - Dimensional, Basic Black 5/8" Satin Ribbon

If you would like to order any of the above or the other supplies from the current catalogues then please get in touch either by e mail ails300@btinternet.com or call 07827923123.  I would be delighted to help you with your crafty projects.  Oh and don't forget to let me know which one of the free paper sets from Aprils Gift with Purchase Event that you would like if your order reaches £45!


Friday, 20 April 2012

Ghostly Paisley Petals


My goodness, it's friday again!  And I'm back with another card as Guest Designer at The Friday Mashup.

Here's the challenge for this week -


So here is the "Mashup" Challenge :
  1. Make a project using the " Sketch ".
  2. Or Make a project using the " Ghosting (aka VersaMark Resist) Technique".
  3. Or "Mash it Up" and create a project using the " Sketch & the Ghosting Technique".

For my card, I loved the white space on the tag in the sketch so decided to leave my tag white.  I mounted it onto Concord Crush, same as the card base.  Added a strip of Lucky Limeade punched with the Scallop Edge Border Punch. The ribbon is a little Old Olive knotted.  Just For You is from Teeny Tiny Wishes and is stamped in white onto Concord Crush punched out with the Modern Label Punch

My big flower is from Paisley Petals.  I stamped it in Versamark onto some Glossy Paper.  Then sponged Concord Crush into the middle adding Lucky Limeade to the outside edges.   I fussy cut it out and added a brad from Antique Brads and attached it with a Dimensional slightly rounding in the petals.  The sponging gives the whole effect a soft look.

To make the background panel, I again used Glossy Paper and stamped another image from Paisley Petals in Versamark.  This time I used a Brayer to apply Lucky Limeade ink all over it.  You can see the difference when using this method.  The images and ink are 
much more vibrant. This was then matted onto a Whisper White layer. 

I hope you decide to join in this week and have a go at the ghosting technique.  It's great fun to see the images magically appear! 

Supplies Used
All Stampin' Up!

Card - Concord Crush, Whisper White, Glossy
Ink - Versamark, White, Concord Crush, Lucky Limeade
Stamps - Paisley Petals, Teeny Tiny Wishes
Punch - Scallop Edge Border, Modern Label
Tools - Sponge Daubers, Brayer
Other - Antique Brad, 1/4" Old Olive Grosgrain Ribbon, Dimensional

If you would like to order any of the above or the other supplies from the current catalogues then please get in touch either by e mail ails300@btinternet.com or call 07827923123.  I would be delighted to help you with your crafty projects.  Oh and don't forget to let me know which one of the free paper sets from Aprils Gift with Purchase Event that you would like if your order reaches £45!


Friday, 13 April 2012

Punch Art Kermit - Yay!!

And Yay! again cos it's Friday!  

Here's the Friday Mashup for this week and isn't it fun? 

So here is the "Mashup" Challenge :
  1. Make a project using "Your Favorite Muppet Color Combo".
  2. Or Make a project " for kids".
  3. Or "Mash it Up" and create a " Project for a Kid using your Favorite Muppet Colors".
Don't forget to tell us or Show us who your Favorite Muppet is!


Well I've not just made a kids card or just used muppet colours but made a muppet card!  It's Kermit of course.  You knew that didn't you?  I hope so!!


I first of all shaped my card by cutting triangles.  He is of course wearing Old Olive today sponged with Old Olive ink to give a slight textured look.  His frill is Certainly Celery made with the Petite Pennants Punch.  Just what all best dressed frogs are wearing this season! 

 His eyes are 1" circles punched out of Whisper White and popped back into the Round Tab Punch to create the curve at the bottom of his eyes.  The black centres are the four petal Itty Bitty Shapes Punch but with one petal snipped off. 

For his mouth I cut a triangle of Real Red and added a 1" circle punch of Blushing Bride lightly sponged and snipped to give a straight edge. 

I cut the Yay! using Timeless Type Junior Alphabet Sizzlits in Basic Black.  

Here's the middle - 


I carried the frill round into the middle and stamped It's Your Day!  from Happiest Birthday Wishes.  This is one of most versatile sets for birthdays ever!  You can earn this set with your hostess pounds when you place a qualifying order. 

I stamped Happy Birthday from For My Family and punched it out with the Word Window Punch before attaching it to a little ribbon banner.

I hope you've enjoyed your little visit to Kermit and will hop on over to the Friday Mashup to see some really inspiring cards. 

Supplies Used
All Stampin' Up! 

Card - Old Olive, Certainly Celery, Whisper White, Basic Black, Real Red, Blushing Bride
Ink - Basic Black
Stamp - Happiest Birthday Wishes, For My Family
Punch - Petite Pennants, 1" Circle, Round Tab, Itty Bitty Shapes, Word Window
Sizzlits - Timeless Type Junior Alphabet  

If you would like to order any of the above or the other supplies from the current catalogues then please get in touch either by e mail ails300@btinternet.com or call 07827923123.  I would be delighted to help you with your crafty projects.  Oh and don't forget to let me know which one of the free paper sets from Aprils Gift with Purchase Event that you would like if your order reaches £45!

Friday, 6 April 2012

Just Believe in Joy......


A joy fold card that is!  Hee Hee.  This is my first try at this type of card and I love it.  So you may see more!!

And this is how it opens - 


Now what was my reason for trying a different fold?  Well it's to join in with The Friday Mashup and not just join in but I'm delighted to say I've been asked to be a Guest Designer for April.  I was so surprised and pleased to receive an email from Holly.  I've played along with this challenge many times and I love the twist of mashing it up or not.  

Here's this weeks challenge -


So here is the "Mashup" Challenge :
  1. Make a project using " a Special Fold".
  2. Or Make a project using the " Tic Tac Toe Board".
  3. Or "Mash it Up" and create a " Special Fold card using Tic Tac Toe".

I've gone with Neutrals, Ribbons and Flowers and as I already said a Joy Fold.  

My card base is Crumb Cake.  I made my own designer paper using Very Vanilla and the Just Believe stamp set. I used River Rock to stamp the background flowers and Soft Suede for the sentiments and frame. The edges of the base panels were sponged with River Rock and Crumb Cake.  The mat for the middle fold is Chocolate Chip and the panels were lightly sponged all over with River Rock and Crumb cake.  I added a trim of Chocolate Chip 1/4" Grosgrain Ribbon.

I used the circle stamp in Soft Suede and punched out with the 1 1/4" punch.  Then added a ribbon tag of Very Vanilla and attached to the front of the card. 


I've only got 1 place left on my Stampers 6!  If you would like to receive a parcel of goodies each month then check out the Virtual Hostess Page on my top bar and get in touch - ails300@btinternet.com. It would be lovely to hear from you! 


Thanks for dropping in past, I appreciate your visit.  Have a look at the challenge and the gorgeous inspiration from the other designers.  x 


Supplies Used
All Stampin' Up! 

Card - Crumb Cake, Very Vanilla, Chocolate Chip
Ink - River Rock, Crumb Cake, Soft Suede
Stamp - Just Believe
Other - Chocolate Chip and Very Vanilla 1/4" Grosgrain Ribbon


If you would like to order any of the above or the other supplies from the current catalogues then please get in touch either by e mail ails300@btinternet.com or call 07827923123.  I would be delighted to help you with your crafty projects.  Oh and don't forget to let me know which one of the free paper sets from Aprils Gift with Purchase Event that you would like if your order reaches £45!


Tuesday, 27 March 2012

Baby Quilt


Good Morning!  Hope the sun is shining where you are today.

I've a baby card to share with you.  The Friday Mashup are asking you to

Make a project using the "Quilted Cards Technique"
Or Make a project using "Something that's been forgotten (sitting in your stash forever)"
Or "Mash it Up" and create a "Quilted card with something you've forgotten about"                            

So I had great fun making my quilted card.  I stamped Fox and Friends animals in Bashful Blue, Marina Mist, So Saffron and Certainly Celery.  Then punched out the animals using 1 1/4" Punch.  I also punched another 4 squares.  Then die cut the letters using Timeless Type Junior Alphabets and attached these to the squares.  I also punched squares out of Beau Chateau Designer Series Paper and cut these in half.  Then formed a pattern onto copier paper and attached the squares to it.  I ran this through the Square Lattice Embossing Folder.  Then further trimmed my "quilt" to fit the card base.  

I added a border of So Saffron and edged the bottom with the Scallop Edge Punch.  Then added another border of Certainly Celery before attaching to a Marina Mist card base. 

To finish I attached a rhinestone brad to one corner, which is my forgotten item.

Thanks for dropping by today and Welcome to Victoria.  I appreciate you following my little blog.  Hope you pop by often. 

Supplies Used
All Stampin' Up!

Card - Marina Mist, Certainly Celery, So Saffron, Whisper White, Bashful Blue
Ink - Bashful Blue, Marina Mist, Certainly Celery, So Saffron
Stamp - Fox and Friends
Sizzlits - Timeless Type Junior Alphabet
Embossing Folders - Square Lattice
Punch - 1 1/4" Square, Scallop edge 
Designer Series Paper - Beau Chateau

If you would like to order any of the above or the other supplies from the current catalogues then please get in touch either by e mail ails300@btinternet.com or call 07827923123.  I would be delighted to help you with your crafty projects.  Oh and don't forget to let me know which one of the free sets from Sale-A-Bration that you would like if your order reaches £45.
Last week!! x


Friday, 16 March 2012

Faux Mother of Pearl Congratulations


Happy Friday Everyone.

My card today is for two challenges.  


follow the sketch and/or mash it up using the faux Mother of Pearl technique.  There's a tutorial on the challenge site. 

and the other challenge is CASual Fridays and for this week - 


CFC44:  It's as Easy as 1-2-3  Create a Clean And Simple project using 
1. A Pattern
2.  An Image
3.  A Sentiment
Sound easy?  Remember to keep it CAS!

So onto the card.  

The card base is Basic Black with a mat of Very Vanilla.  I wrapped some Rose red seam binding around the middle and tied a bow.  Then stamped Congratulations from Occasional Quotes (a retired set) in Basic Black.  

I punched out a scalloped circle in Basic Black with the 2 3/8" scallop circle punch and added a Basic Pearl to all the scallops. I punched a circle of very Vanilla with the 1 3/4" circle punch.  Then using Frost White Shimmer Paint dabbed a pattern with some kitchen roll to make the faux Mother of Pearl.  Once dry I stamped a heart from I {heart} hearts in Jet Back Stazon. 


Here's a close up to show the faux mother of pearl -


On the inside I've layered some Very Vanilla on Rose Red card to tie in with the ribbon on the front.  I've left it blank meantime until I decide why it's congratulations. 

Still time to join my Stampers 6 club starting in April.  This is a good time to join the club because there are lots of good things coming from Stampin' Up! in the next couple of months.   You can e mail me on ails300@btinternet.com to book your place. 


Supplies used
All Stampin' Up unless otherwise stated

Card - Basic Black, Rose Red, Very Vanilla
Ink  - Basic Black, Stazon Black
Stamps - I {heart} hearts, Occasional Quotes
Ribbon - Rose Red Seam Binding
Punch - 2 3/8" Scallop Punch, 1 3/4" circle
Other - Basic Pearls, Frost White Shimmer Paint


If you would like to order any of the above or the other supplies from the current catalogues then please get in touch either by e mail ails300@btinternet.com or call 07827923123.  I would be delighted to help you with your crafty projects.  Oh and don't forget to let me know which one of the free sets from Sale-A-Bration that you would like if your order reaches £45. x

Friday, 17 February 2012

Happiest Birthday Wishes goes Vintage


Well I've had 3 challenges buzzing round my head today and here's what I came up with.  

The card base is Early Espresso with a Peach Parfait mat.  I then added a Very Vanilla panel with the corners punched using the 1/2" Circle Punch and roughed up the edges with my paper snips I stamped the medallion stamp from Happiest Birthday Wishes in Early Espresso twice then again in Calypso Coral.  The centers were punched out using the 1 1/4" Circle Punch and the 1" Circle Punch with the last circle popped up on a Dimensional. 

I attached some Victoria lace ribbon to some Linen Thread and then finished off the card with   Some Basic Pearls.  

Well I hope I've complied to the different challenges.  I'm sure the ladies will tell me if I haven't. 


CAS-ual Fridays - A party card with ribbon

The Friday Mashup - To follow a sketch or go Vintage/Shabby Chic or do both.  I've chosen Vintage. 


Woohoo it's the weekend.  I hope you have a lovely time planned.  Thanks for coming by. x 


Supplies Used
All Stampin Up! 

Card - Early Espresso, Peach Parfait, Very Vanilla
Ink - Early Espresso, Calypso Coral
Stamp - Happiest Birthday Wishes
Punch - 1/2" circle, 1" circle, 1 1/4" circle
Other - Basic Pearls, Victoria Lace Ribbon, Linen Thread, Dimensional

If you would like to order any of the above or the other supplies from the current catalogues then please get in touch either by e mail ails300@btinternet.com or call 07827923123.  I would be delighted to help you with your crafty projects.  Oh and don't forget to let me know which one of the free sets you would like if your order reaches £45. x

Thursday, 16 February 2012

Is it an owl or is it a penguin?


I've changed my little owl from the Owl Builder Punch into a penguin for todays card.  This was easy to do, just take off the ears and feet.  Don't worry he doesn't feel a thing!! 

The party penguin has been lifted up and balances on top of one of his friends.  He looks a bit precarious and it's made his eyes go all funny!  

So why have I gone all penguin?  Well it's for THE FRIDAY MASHUP which this week is to use a penguin on your card or the spotlighting technique or do both.  I've just gone for the penguins. 

To make the penguins I've punched them out of Basic Black, Whisper White and Pumpkin Pie for the beak and feet.  I used Boho Blossoms to punch out a little flower then trimmed them for each foot. 

Party boys hat was cut out of Basic Black with some Celebrations Designer Paper (now retired) paper pieced on top. 

The background panel was stamped in Bashful Blue on Whisper White using a little snowflake from Pennant Parade.  Then mounted onto Real Red card.  The long panel is just Whisper White on Real Red with a Scallop Edge Border along the bottom.  The card base is Basic Black. 

I followed the sketch over at SIMPLY STAMPIN' to make this fun card.  Here's the sketch - 


Thanks for dropping in past and a big Hello to Marja I'm delighted you have decided to follow me and hope to see you back often. 

Edit:  Ooops missed the Friday Mashup deadline!  

Supplies Used
All Stampin' Up! 

Card - Basic Black, Whisper White, Real Red, Pumpkin Pie
Ink - Bashful Blue, Basic Black
Stamps - Party This Way, Pennant Parade
Punch - Owl Builder, Scallop Edge Border, Boho Blossoms
Other - Designer Series Paper

If you would like to order any of the above or the other supplies from the current catalogues then please get in touch either by e mail ails300@btinternet.com or call 07827923123.  I would be delighted to help you with your crafty projects.  Oh and don't forget to let me know which one of the free sets you would like if your order reaches £45. x


Friday, 3 February 2012

Perfect Postage Hearts


Another Perfect Postage creation today this time using the heart stamp.  I was in town yesterday and was inspired by the navy and red colour scheme in one of the shops.  So decided to try it out on this card. 

I love the heart stamp from Perfect Postage, it's perfect for this time of year.  I stamped it out four times in Real Red then punched it out using the Postage Stamp Punch.  The four stamps were attached to a Night of Navy panel on Dimensionals which in turn was mounted onto a Whisper White panel.  I then attached some Real Red Grosgrain Ribbon over one corner and added a Red Rhinestone Brad.  

I love that Stampin' Up! has so many products that match and co-ordinate.  No more hunting around for that perfectly matching embellishment! 


My sentiment is from Delightful Dozen.  I used my Stamp-a-ma-jig to position the sentiment at the top left and bottom right corners.  I inked the sentiment with my Real Red Stampin' Write Marker so I could just pick up the words I wanted.  I then went over them using the nib end to define the words a little more. 

Here's another formula for Sale-A-Bration

Perfect Postage £ 8.95 clear + Postage Stamp Punch £14.25 + Brights Stampin' Write Markers £ 23.95 = 1 free set 

It's so easy to earn free stamp sets during Sale-A-Bration and who doesn't like a freebie?!! 

It may be -3 outside but the sun is shining and that makes me happy.  Hope you are feeling happy too. x 

I'm going to enter this card into The Friday Mashup - "All you need is love" which for this week is an inspiration photo.  All I saw was all those gorgeous hearts.  
You can also mash it up with the following colours - Cherry Cobbler, Regal Rose, Whisper White.  If I have time this week I may have another go using these gorgeous colours. 

Here's the supply list - 

Supplies Used
All Stampin' Up! 

Card - Real Red, Whisper White, Night of Navy
Ink - Real Red
Stamps - Perfect Postage, Delightful Dozen
Other - Dimensionals, Real Red Stampin Write Marker, 1/4" Real Red Grosgrain Ribbon, Red Rhinestone Brad


LinkWithin

Related Posts Plugin for WordPress, Blogger...